My Nail Care Routine.
Hello lovely readers! For this blog post I am very excited to be sharing with you all something which many of my followers have requested from me; my weekly nail care routine! Many times when I am doing a Q&A on my instagram story my ‘Talons’, as they have been dubbed by my lovely followers, always come up in conversations and I am repeatedly asked how I achieve such a sharp shape, maintain such long nails and prevent them from breaking. I do have a very long story highlight on my Instagram profile which answers most of those questions, but I decided it was time to write a more detailed piece wherein I can answer these questions and hopefully dispense some helpful knowledge, tips or product recommendations for anyone who would like to grow talons of their own. The short answer to many questions about my nails is simply good maintenance and hydration but let’s jump right into the process!
Please note: This post does include a product which was gifted to me by a brand but I was under no obligation to include it in this post. I am not a licensed nail technician, any information or advice I share in this post has been researched and approved by professionals. The products included are all ones which I have found to be as most helpful and useful to me but may not yield the same results on everyone, these are my personal favourites. As always; all thoughts and opinions are completely my own.
The Before Picture.
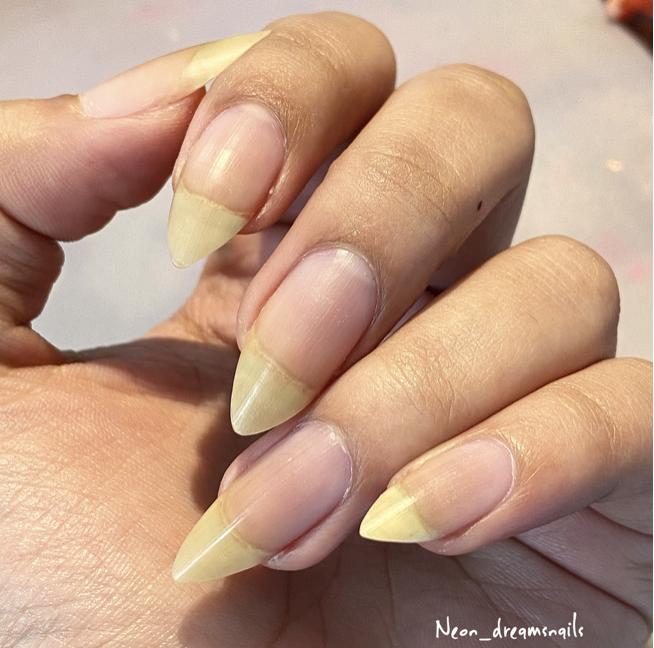
Before we dive into the full routine I would like to start by sharing a picture of what my nails look like before the routine is complete. As you can see, my cuticles are very dry and dehydrated. My pointer finger has a chip on the tip of nail and a small hang-nail on the side too. Across all my nails, the tips have lost their shape and have become much more rounded, as opposed to a sharp point and there are also specks of dirt underneath the free edge. Overall they are quite unkempt and not the most photogenic either.
File and Shape
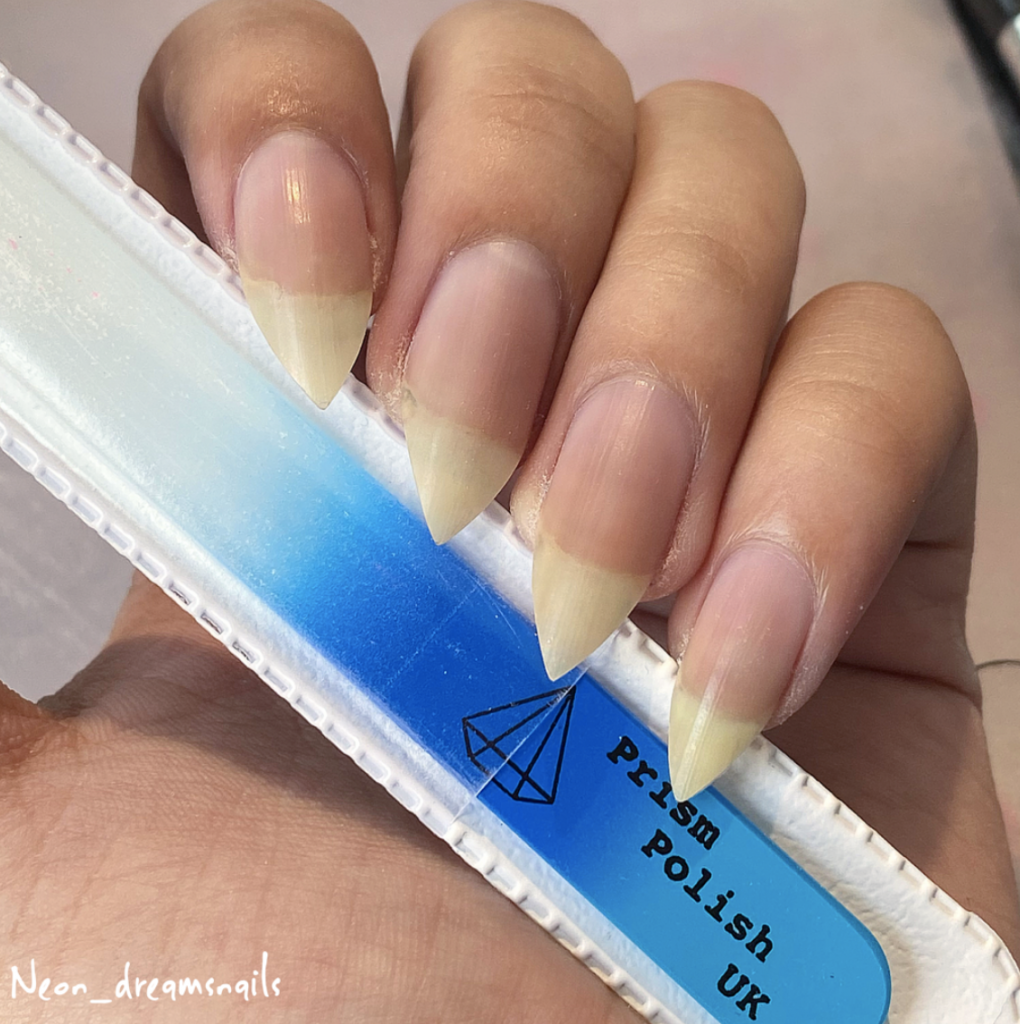
The first step in my routine is to file and shape my nails. For me, personally, maintaining the very sharp point of my free edge is the main priority for myself. There are many debates in the nail community on whether it is better to use a glass nail file or emery board to file your nails, I actually use both. I had tried using a glass nail file years ago but actually really disliked it and ended up dropping it on the floor and breaking it a few days later too, since then I had stuck to only using emery boards until I was kindly gifted a medium-sized glass nail file by the lovely Prism Polish, which are genuine tempered Czech files, and now my glass nail file is a central aspect of my nail care routine. Glass nail files can be slightly intimidating at first, and finding the right one for your nails can often take some time, but once I had the one that is right for my nails, I have definitely noticed a difference in my nails. For starters, the process of shaping my nails has shortened significantly and the sharpness to which my nails can be shaped into is almost dangerous! The sharpness of the glass nail files allows for a quick and precise shaping process despite the surface of glass nail files being much smoother than an Emery board; which in turn means that any splitting and peeling of the nails is much less likely to occur whilst using a glass file. The only time I reach for an emery board now is in order to file and shape the corners of nails, nearest to the skin; this is to ensure that the shape of my nails looks as fresh as possible and not as though they are grown-out, but I use an emery board for this part of the shaping process because I find the thickness of a glass nail file does not allow for intricately filing in the corners of nails, but I aim to use the emery board as little as possible and only file in one straight motion, instead of backwards and forwards, to avoid splitting or weakening the nails as much as possible. The picture below shows my nails freshly shaped alongside the glass nail file I use.
Cuticle Remover
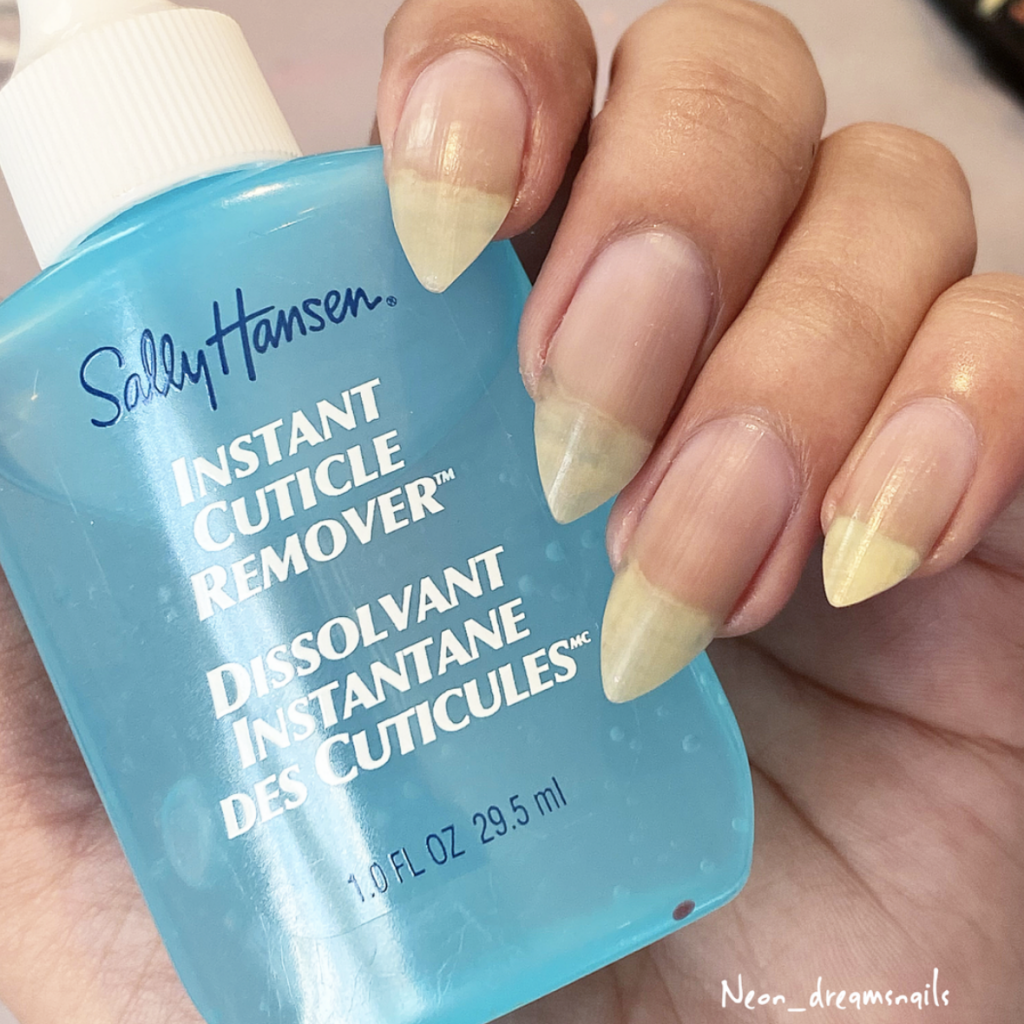
The next step in my routine is to apply cuticle remover. Some people choose to cut their cuticles, and even though I have tried that before, it personally is not for me. For my nails, using cuticle remover is great help. I have tried quite a few before, from both drugstore and indie brands but I have found the Sally Hansen ‘Instant Cuticle Remover’ to be my absolute favourite. It has a gel-like formula and is very easy to use; simply apply a small amount to the cuticles and skin around the nails, leave on for about thirty seconds and then take a tool of your choice, could be a glass cuticle pusher or I prefer to use an orange stick, and then gently push back your cuticles and while doing so, very gently use the tool to remove any dead excess skin from around the nails and cuticles. I only started using cuticle removers in the last year but I have definitely noticed a difference. My cuticles have been appeared much smoother and feel much softer than before. Sometimes if my cuticles are feeling extra dry I will apply some cuticle remover and just let it sit on the skin around my nails and then wash it off, just for it’s softening qualities. I only use cuticle remover once a week, otherwise, and have found it to have made a wonderful difference to my manicures with my cuticles looking much healthier now.
Hand and Nail Scrub
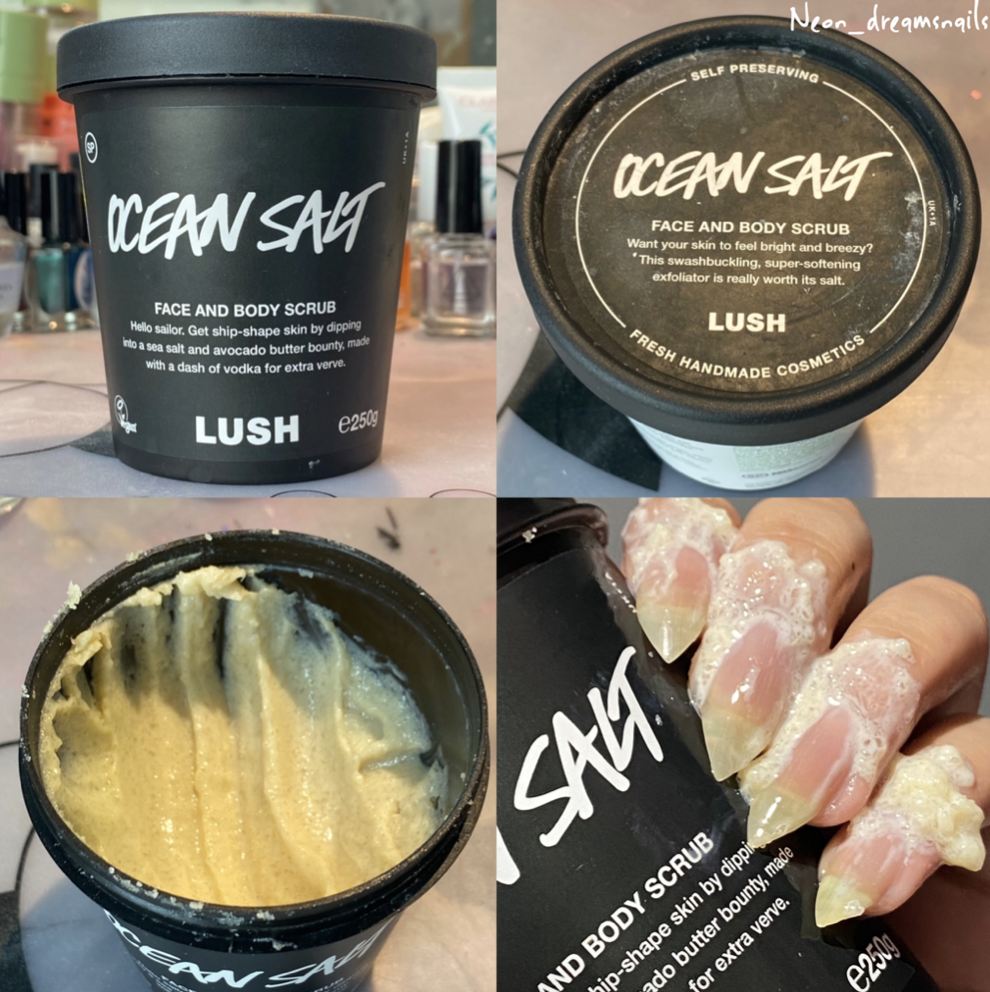
After I have finished pushing my cuticles back, it’s important to wash the hands with warm, soapy water to get rid of the excess remover and any leftover dust or shavings after filing as well. After this initial wash is complete, I then exfoliate my hands and nails. Exfoliating the nails is not a completely essential, and I will only do this once every other week, but this is the part of the routine where I do. Exfoliating the nails helps the cuticles to feel much smoother and healthier and also helps to remove any build-up of dead skin cells left on the skin, leaving the nails and cuticles looking much brighter and feeling much softer and also can promote nail growth too. One year ago I would never have considered exfoliating my nails but once I started I have noticed a significant difference; my nails look healthier, not only for the brightening aspects of exfoliation, but it also aids in removing any dirt that may be stuck under the free edge or in the cuticles. It is recommended to use a sugar scrub on the cuticles, as it is a very delicate and soft area of skin; and these are available from many indie polish sellers and websites, however I prefer to use a salt scrub. Sugar scrubs are very useful for a weekly manual exfoliation, but beyond that they mostly lack many of the other benefits using a salt scrub can bring; salt is a natural antiseptic and is known to be naturally detoxifying on the skin and I personally have found switching to a salt scrub has left my nail beds much smoother and cleaner. Alongside this, because salt scrubs naturally have larger grains I only need to use a small amount on my cuticles and the product lasts much longer. The salt scrub of my choice is ‘Ocean Salt’ from LUSH, which is filled with sea salt, grapefruit infusion, avocado butter, coconut oil and fresh lime extracted in vodka. The exfoliant is definitely on the harsher side so I use very little but it definitely goes a long way. In the pot you can definitely smell the sea salt and the lime, almost like a cocktail in salty sea air, but it leaves a lovely citrus scent on the nails afterwards. It is worth noting that using a salt scrub will sting if you have any open cuts in the area you’re using it in, but when I use this scrub, I can definitely feel it working into my cuticles and my skin definitely feels much cleaner and softer and I find that it preps my nail beds and cuticles perfectly for new swatches and manicures.
Hand and Nail Cream
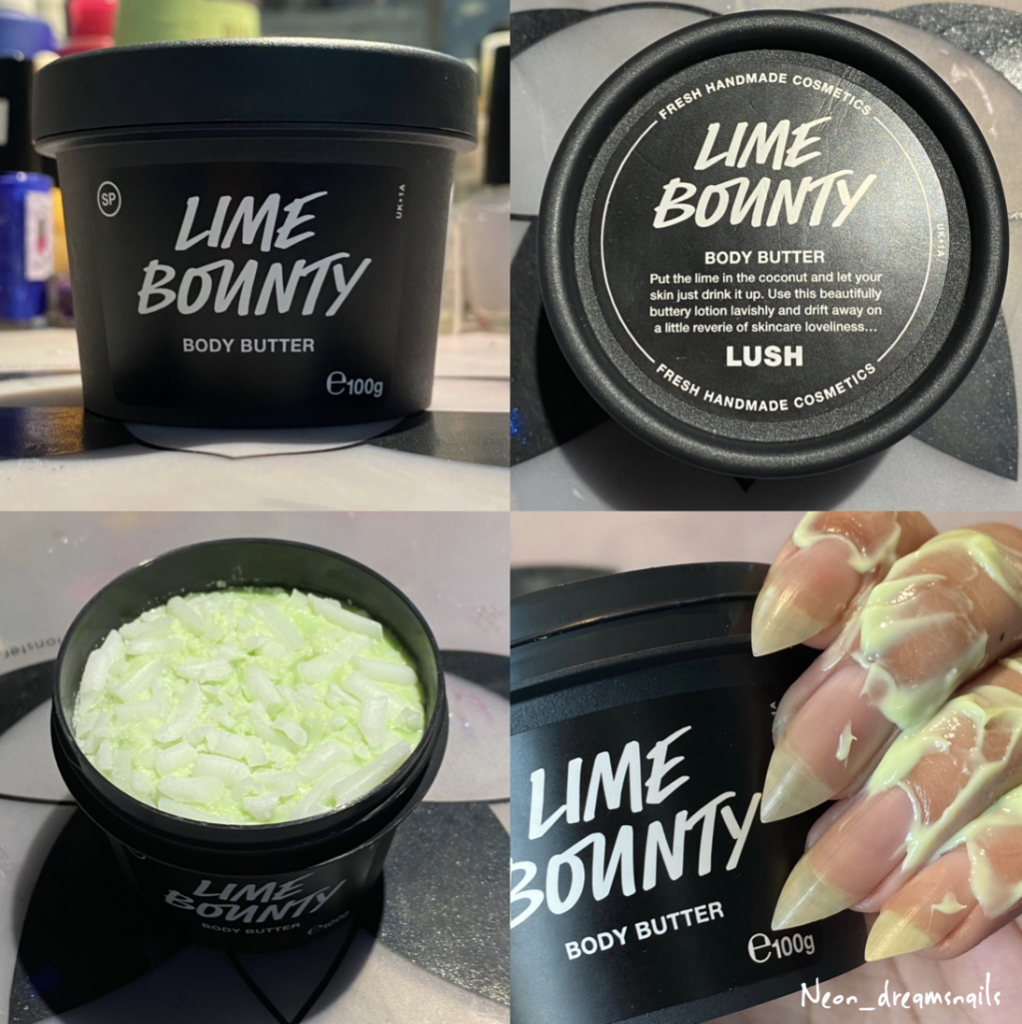
After exfoliating, it is important to wash your hands clean with soap and warm water and pat dry, making sure any residue from the exfoliant is completely cleaned off. After this, it is necessary to hydrate and moisture the hands and nails as exfoliating can sometimes dry out the skin and regular hydrating promotes healthy, strong nail beds and growth. Finding a good hand cream that works for you, individually, can often be a long and burdensome process. For a very long time I would simply use whichever hand cream was lying around my house and had tried quite a few which never worked for me. Personally I don’t like hand creams that leave a lot of oil and residue on the hands, as this can often make my nails look greasy in swatches, but also I don’t want something that will absorb into the skin so fast that afterwards it feels though I didn’t even apply any product; I also like a cream to be scented but not too overpowering. Very recently I was finally able to visit my local LUSH store and was able to ask a very lovely and helpful shop assistant to recommend a cream to suit my swatching and hydrating requirements and she recommended their ‘Lime Bounty’ body butter. I will admit, when I saw the cream was bright green I was quite surprised but as the shop assistant began to explain more about the cream I was intrigued. This is a newer product from LUSH and is full of Extra Virgin Olive Oil, Coconut Oil, Lime Oil and has shavings of coconut and shea butter on the top too, so you know it is packed with hydration! I tried a little bit of this from a tester stick in the store and was really impressed by how such a small amount offered so much hydration, and even though it absorbed quite quickly, my hands still felt very well moisturised afterwards, without being greasy or oily. I liked it so much I decided to purchase a small tub have been really enjoying it ever since! I use it quite regularly now, not only as part of this weekly routine but any time my hands and nails are feeling particularly dry; it provides amazing hydration without the greasiness. Moreover, as a body butter this can also be used everywhere on the body too! The scent is beautiful too; top notes of lime with a slightly sweet coconut undertone without being overpowering.
Nail Treatment
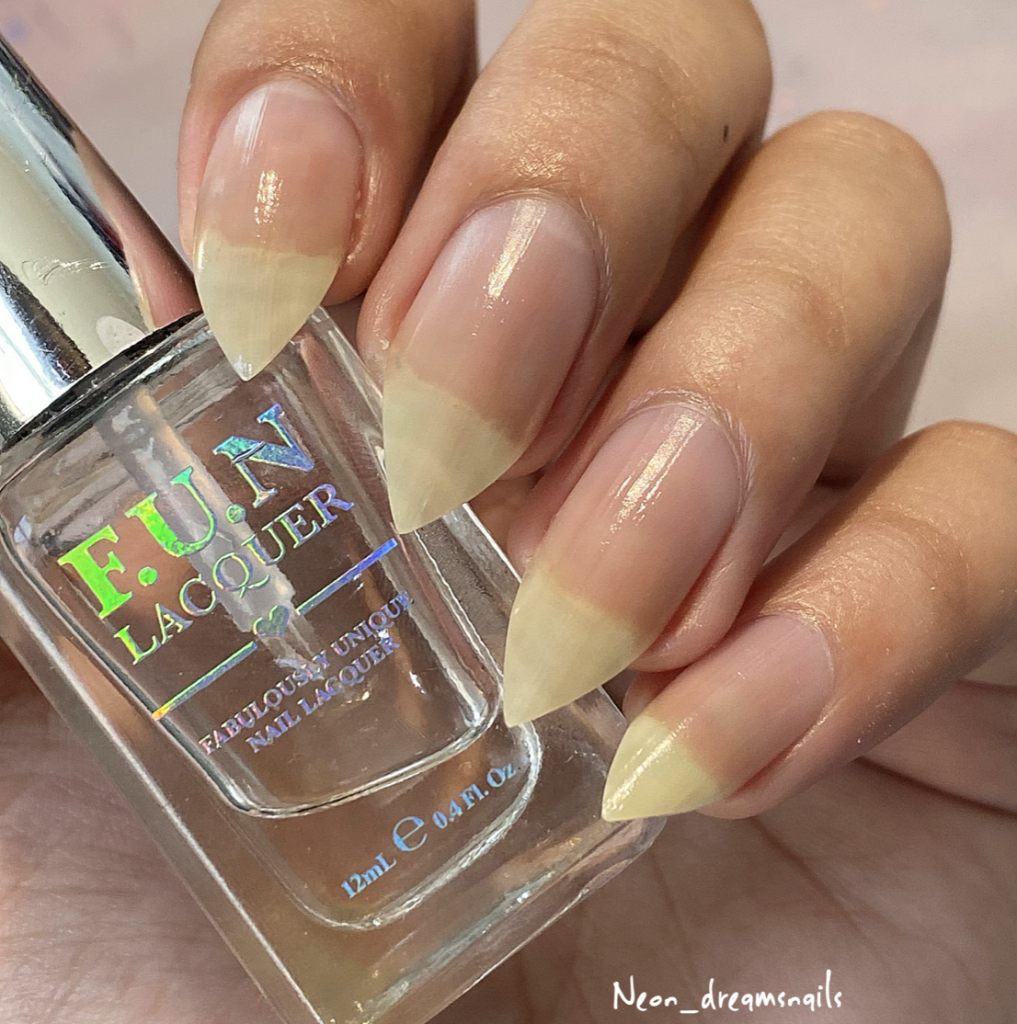
After the moisturiser has had time to sink into the nails and the nail plate, itself, has dried I like to apply a nail treatment as the final step. These usually come in the form of a clear coat or base coat to be painted onto the nails. Once again, everyone’s choices will be different and everyone will look for different priorities in a product. Years ago I used to use a hardening treatment for the nails from the drug store but instead I found it just made my nails much more brittle and highly susceptible to breaking and instead decided to switch to a nail nutrition treatment, after being recommended to do so by some fellow nail friends. Last May, I ordered the ‘Triple 5’ nail treatment from FUN Lacquer from their UK distributor Rainbow Connection, seeing as the product came very highly recommended. ‘Triple 5’ takes it’s name from the five different vitamins and 5 different plant extracts in the formula which all work to improve the strength and health of your nails; for a full list of ingredients I highly recommend reading from the FUN Lacquer website. Honestly I had little hope for this product initially, clear coats similar to this had never worked for me in the past and was unsure as to whether it would make any difference to my nails, but it really did. I decided to start using it as a basecoat underneath my manicures and in a relatively short time found that the consistent splitting and weakness of my nails which had caused them to become so brittle and very prone to breaking soon disappeared and my nails have been able to continuously grow while remaining hydrated and strong; alongside this my nails even looked much healthier and brighter too. I like to apply this at the end of my nail care routine either as a basecoat underneath whatever I choose to paint onto my nails, or apply up to two coats on my natural nails to ensure my nails are able to receive all the benefits of using the product for the following days, protect my natural nails from breaking by keeping them painted and keep my nails looking healthy. Shown in the photo below is one coat of ‘Triple 5’ from FUN Lacquer over my natural nails; as you can see my nails look refreshed and healthy, my cuticles are clean and hydrated and perfect to paint over!
Cuticle Oil
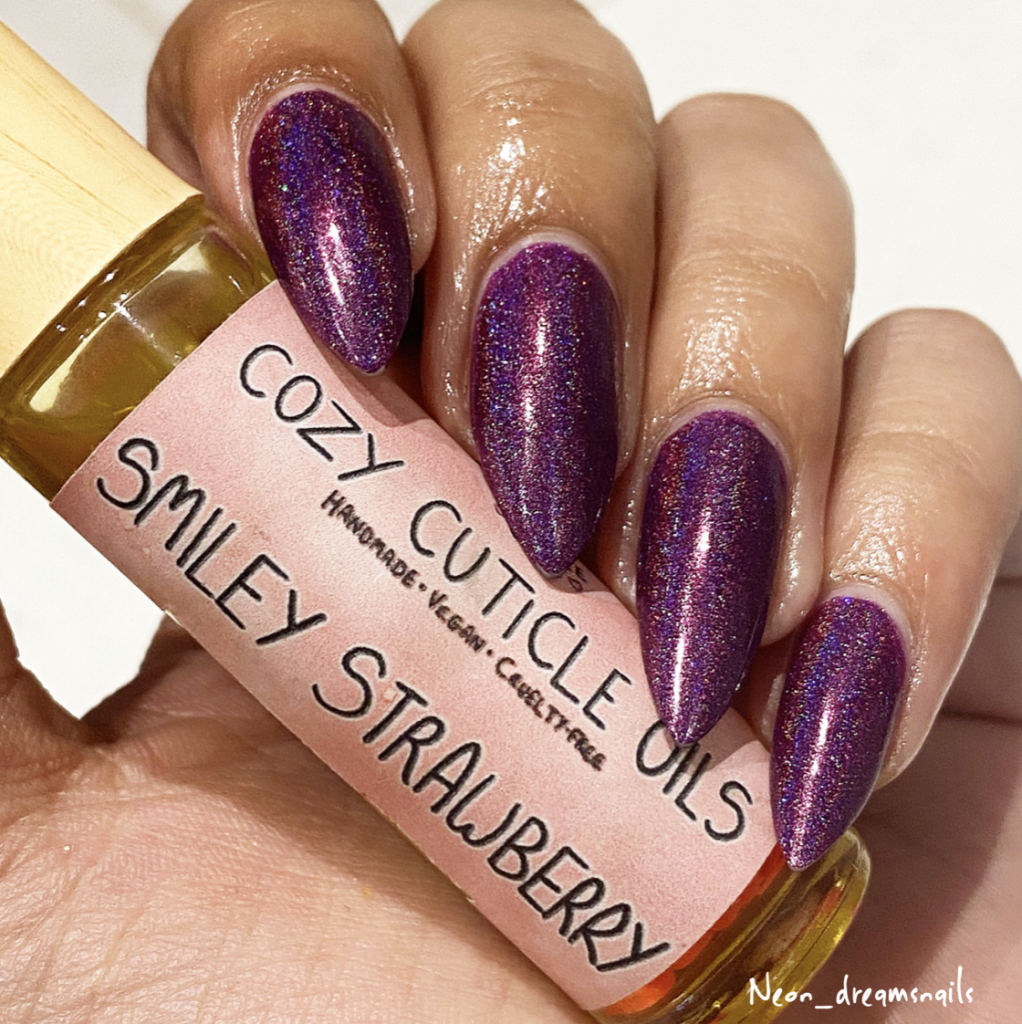
This last inclusion is not a specific step in this routine but something which can, and should, be done multiple times throughout the day, each week. Cuticle oil is the staple, baseline, product that everyone needs in their own nail care routine. Cuticle oil is an easy and effective way to keep your cuticles and nails hydrated and healthy, regular cuticle oiling also can help promote nail growth and keeps cuticles looking very healthy for photos! I aim to apply cuticle oil at least once or twice a day as is recommended to do so, not only to maintain hydration but cuticle oil also helps protect the nails from breaking and can increase circulation around the nail bed to promote growth. I know some swatches do full oil soaks for their nail beds, but personally it is not for me. Similarly to moisturiser, everyone has different qualities in a cuticle oil which they will prioritise when searching for one which will work for their nails, even down to which style of applicator the oil comes in; I prefer an oil that is light and hydrating but not greasy, I’m a big fan of citrus scents and sweet scents and I will be happy with any form of applicator as long as the oil is at little-to-no risk of spilling. I actually own quite a few different cuticle oils, I always love to try out different brands and it’s really helpful to have a range to choose from and a number of oils to keep on hand, at my swatching table, in other rooms of my house and in various handbags so I can keep my nails hydrated on the go too! The one, however, that I would like to bring attention to in this post is one of the newest oils to my collection and is from a new independent brand called Cozy Cuticle Oils and specifically the scent ‘Smily Strawberry’. Cozy Cuticle Oils opened their shop in March of 2021 with a distinct focus on helping everyone’s nails be as well-hydrated and strong as possible. Cozy Cuticle Oils are all hand mixed and include ingredients such as jojoba oil and vitamin E oils to promote hydration and healthy nail beds, as well as nut oils such as macadamia and almond sweet to aid in fast absorption and promote growth. Alongside this, by using essential oils, the various scents they come in all smell amazing and not artificial at all. As well as this, all their oils come in a variety of applicators including pens, rollerballs and droppers. Plus their packaging is absolutely adorable! I had never used a rollerball application for cuticle oil before, but have found I really love this one! The strawberry scent is not overpowering and smells quite natural as opposed to that intense artificial strawberry scent and the oil itself fit my criteria perfectly; I love using it in between swatch photos as it is so hydrating and makes my cuticles feels very soft but also absorbs very fast into the skin. Shown in the picture is ‘Smile Strawberry’ from Cosy Cuticle Oils applied to the cuticles and on my nails is ‘Twilight’ from Enchanted Polish.
And that is all the nail care I have to share with you all! Just to quickly reiterate; this routine and these products are what work for me and what I personally prefer using and I wanted to share them. Everyone’s nails are different and beautiful in their own way but I hope this read has been interesting and given a nice insight into how I maintain such long nails and possibly also helped discover some new treatments, products or tips to keep nails as healthy as possible. Overall, I think the key to strong and healthy nails, regardless of length, is hydration and good maintenance. I hope this post was help and be sure to leave a comment letting know if you enjoyed it and would like to see more content like this!
Thank you so much for reading 🙂